How Do You Make Butter Slime: Easy Step-by-Step Guide for Kids and Parents
What is Butter Slime?
Butter slime might sound like it carries butter, but it doesn’t. It probably got its name from its buttery texture. It’s fluffier and more moldable than one might expect, but not as stretchy as expected. Most butter slime recipes contain some sort of soft clay.
For example, I mostly use Model Magic clay as it is non-toxic. You can also use any other brand of soft clay, but ensure it’s non-toxic.
I tried many different variations of butter slime, but the recipe that finally made me happy is the one I will share here.
I have also tested other slime recipes. My experience is that butter slime is not very stretchy. To make it stretchy, try adding baby lotion, oil, and water. You can skip these ingredients if you don’t want stretchy slime and prefer a moldable substance.
Want to craft slime that is as soft as butter? Making soft clay slime is a fun DIY activity for kids and parents. Here are secret ways to make butter slime at home.
Butter Slime Ingredients: What You Need to Get Started
Butter Slime Ingredients: What You Need to Get Started
Making butter slime is a fantastic fun game. It doesn’t leave any residue or mess in your hands, as this recipe doesn’t need any food coloring. That is why we use colored Model Magic.
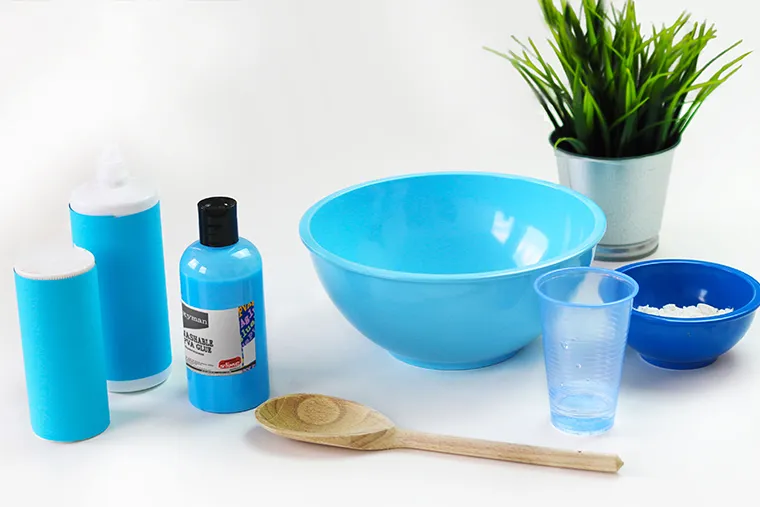
Here are the supplies needed:
You need all the regular slime-making ingredients and an essential addition – Model Magic Clay.
- 1/3 cup of shaving foam
- 1/2 cup of white school glue (I mostly use Elmer’s Glue)
- 1/4 cup of water
- Slime activator
- 1/4 teaspoon of baking soda
- 1 cup of Model Magic clay
After crafting DIY slime, you won’t have stained hands as you no longer need to color your glue. Any slime you play with gives much pleasure, no matter if it’s butter slime. If you have extra Model Magic, seal it properly for later use or continue using it to make different things like sculpting, play dough, etc. This homemade slime is usually less stretchy, so add some baby lotion or oil to make it more elastic. Once created, let it add to the fun of kids’ activities.
Step-by-Step Guide to Making Butter Slime
Place all the essential stuff on the kitchen shelf (start making slime when you are free from cooking). Mixing the ingredients requires a small and large bowl, a spoon, and a measuring cup.

Step 1: Make a slime activator
This step must be followed if your recipe includes a borax solution. You may skip it if you’re using a contact lens solution as a slime activator. Pour half a cup of warm water into a small bowl and mix it with a half teaspoon of borax. Stir well until the borax dissolves completely. Then let it cool for some time.
Step 2: Prepare slime base
Blend 1/3 cup of shaving foam, 1/4 cup of water, 1/2 cup of Elmer’s glue and 1/4 teaspoon of baking soda. Rest assured that you mix these substances well. If your slime is still lumpy, you must mix the ingredients properly. Try combining them quite minutely before adding the slime activator.
Step 3: Add the activator
Make sure to add the slime activator slowly and in small quantities.
When I make slime for my little daughter, I only add a teaspoon of the activator at a time. I mix it well with the slime base and then add a little more of it. Usually, it takes 2-4 teaspoons of borax solution, but it also depends on the ingredients you use.
The quantity may vary every time. You simply take your time to blend it well with the slime base. It takes a short time to mix before adding the next amount.
So, be sure that the first amount has reacted well with the ingredients before you add more. After these steps, you want firm slime with a slightly sticky and wet consistency. Too firm slime isn’t good, as it doesn’t blend with the clay properly.
Step 4: Knead the clay
Once you’ve crafted slime and the activator has reacted well, it’s time to add the Model Magic Clay. You may use almost an equal quantity of clay to make slime;1 cup would be fine.
This is the most interesting part of the slime game. Try folding clay and slime and kneading them for a long time until they are blended well. The more the kneading, the better the slime consistency. Kids love this step and lend a helping hand in kneading!
Once kneading is done, your butter slime is ready. Superb! Your smooth and stretchy butter slime is finally at hand. Get to the play area, play with it, and have fun. You tried the butter slime recipe. Was it the best slime recipe ever?
Is Slime Liquid or Solid?
Slime is a bit of both, which is called a non-Newtonian fluid. Experiment with varying degrees of viscosity and amounts of foam beads. Observe the density to see if you can transform it.
The Science of Slime
Kids always like to sprinkle a bit of homemade slime science at home. Making slime is a pure chemistry demonstration, and kids love it. Homemade slime allows you to explore science concepts like substances, states of matter, mixtures, elasticity, cross-linking, and viscosity.

The glue is a polymer of long, identical, and repeating strands. These molecules keep the glue liquid flowing past one another. Then, the borate ions you add to the mixture play a further role in connecting the strands together. These substances mix together to make the mixture less liquid than the one you started with and begin to get thick and rubbery like slime. So, slime is a polymer.
Conclusion – How do you make butter slime
My daughter and my little son (who was so cool to slime) both have a passion for slime and have inculcated it in me. Now, I collect the ingredients and make slime for them. It all pleases me, and slime is my great escape from routine stress. I have tried many recipes, and butter slime is one of my best recipes ever.
My daughter is keen on making slime, and she has learned how to make butter slime at home. When you try making butter slime, share your experience in the comments below.
Making butter slime is a fantastic educational science recipe to connect with your kids. Collect the ingredients and head start your journey to DIY slime today.
Subscribe for more fun DIY recipes and activities.